
Use Serverless to create a REST API with Node.js and Lambda
Lately, I’ve been turning to AWS Lambda for building server-side logic — whether for client work, product development, or even personal projects. Lambda is a managed service, so there’s no need to patch or monitor servers. It’s pay-as-you-go, so you only get charged for usage, rather than uptime. And it’s elastic, so it scales up to handle enterprise level traffic, or shrinks to zero for those pet projects that never take off.
There’s usually a lot more to an app than just the Lambda function. API Gateway gives your Lambda a consumer-facing REST endpoint. And IAM policies grant your Lambda access to other AWS services. As your Lambda integrates with more AWS services, managing your app settings can become complicated and error-prone.
The Serverless framework simplifies the process of building and maintaining Lambda applications. Here are a few highlights:
- Infrastructure as code: AWS settings are defined in a configuration file that can be versioned in source control.
- Single point of change: App settings for Lambda, API Gateway, and IAM are consolidated into a single configuration file.
- Simple deployment: Serverless packages and deploys your Lambda app to AWS with a single command.
There are other tools out there to help you manage your Lambda applications. For example, Chalice from AWS Labs supports Lambdas written in Python. This tutorial focuses on Serverless.
Note: The term “serverless architecture” refers to a way of building applications that run without having to manage infrastructure (like an always-on Linux box). The “Serverless framework” is a 3rd party tool that helps you manage and deploy your app to AWS Lambda and API Gateway.
Using Serverless, you’ll create a Node.js REST API that responds with a JSON array describing the contents of an S3 bucket. Your app architecture will end up looking like this:

What you need for this tutorial
All of the steps are performed on a Mac, so you may need to adapt them if you’re using Windows or Linux.
You’ll need an AWS account. If you don’t have one, you can sign up for the free tier.
If don’t have Homebrew, install it with the following command:
/usr/bin/ruby -e "$(curl -fsSL https://raw.githubusercontent.com/Homebrew/install/master/install)"Using Homebrew, install Node.js and Python.
brew install node
brew install python
After you install Python, install the AWS CLI using pip:
sudo pip install awscli --ignore-installed six
1. Install Serverless using NPM
The Serverless framework is an NPM module. To install it, type the following command into Terminal:
$ npm install -g serverless
The -g flag installs Serverless globally, which gives you the convenience of running the serverless command from any directory.
Pro tip: You can install the NPM module local to your project, instead of globally.
$ npm install serverless --save-devThe Serverless team likes to move fast and break things, so it might be a good idea to set your Serverless version in your package.json. This way, you can use the latest version of Serverless on new projects without impacting older ones.
The tradeoff is that you’ll have to drill down to a subfolder in order to reach the
serverlessexecutable:$ ./node_modules/serverless/bin/serverless
2. Create a sample project
Serverless has commands, like create, deploy, and invoke. You’re going to start off with using the create command.
In an empty folder, type the following:
$ serverless create --template aws-nodejs
This creates a new serverless project using the built-in Node.js template.
Note: There’s also a template called
aws-pythonfor you python developers out there.
The create command generates two new files — one for code, and the other for configuration:
handler.js: This file contains your Lambda code.
'use strict';
module.exports.hello = (event, context, callback) => { // 1
  const response = { // 2
    statusCode: 200,
    body: JSON.stringify({
      message: 'Go Serverless v1.0! Your function executed successfully!',
      input: event, // 3
    }),
  };
  callback(null, response); // 4
};
There’s a single function called module.exports.hello that responds with a JSON object. Here are a few things worth pointing out:
- The
eventobject contains information about how the Lambda was triggered. - The
responseobject is a JSON payload with some boilerplate information that you will eventually return to the caller. - The event object is reflected back to the caller for debugging purposes.
- You execute the
callbackwhen you’re ready to respond.
serverless.yml: This is the Serverless configuration file.
service: aws-nodejs
provider:
  name: aws
  runtime: nodejs4.3  # 1
functions:
  hello:  # 2
    handler: handler.hello  # 3
Note: The default YAML file has a lot of comments and whitespace, but you can see a cleaner version using this command:
$ sed '/^[#;].*$/d;/^$/d' serverless.yml
It’s in YAML format, which is like JSON but uses indentation instead of curly braces. You’ll be seeing a lot of the serverless.yml file throughout the tutorial. But for now, just pay attention to these lines:
runtime: You’re using the Node.js runtime. Here’s a list of other runtimes that Lambda supports.hello: This is your function name.handler: This is the file and path to your function.
Give your Lambda function a try by using the invoke command.:
$ sls invoke local -f hello
Even though it’s just a single line, there are a couple things going on here:
sls: This is just a shortcut forserverless.- local: Your function runs on your local machine. Don’t worry, it’s not touching AWS at this point.
- -f hello: You use the function flag and specify
helloas an argument.
You should get a response:
{
  "statusCode": 200,
  "body": "{\"message\":\"Go Serverless v1.0! Your function executed successfully!\",\"input\":\"\"}"
}
So far, you created a Serverless project using a Node.js sample template. Then you invoked the hello function on your local machine.
Now that everything is working locally, it’s time to deploy to the cloud.
3. Create a service account in AWS
Serverless needs access keys in order to perform actions within your AWS account. So you need to create a service account with a set of access keys.
Perform the following steps within the AWS console:
- Go to IAM
- On the left, select the Users tab
- Click the Add user button
- For the User name, type serverless
- Next to Access type, check the box for Programmatic access
- Click the Next: Permissions button

Using the Add user wizard, you begin the process of creating a service account named serverless. You also select Programmatic access, which generates access keys for you.
Continue with the next section of the Add User wizard.
- On the Set permissions for serverless page, click Attach existing policies directly
- Type AdministratorAccess in the search filter
- Check the box next to the AdministratorAccess policy
- Click the Next: Review button
- On the Review page, click the Create user button
- Click the Download .csv button
- Click Close
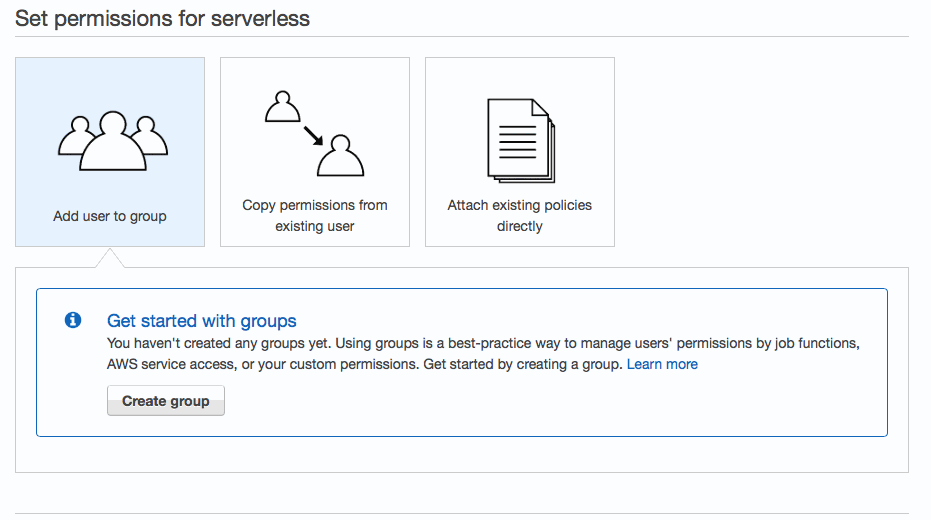
You grant admin privileges to your service account by attaching the AdministratorAccess policy. Once the account is created, you download a CSV file containing the access keys. This is the only chance you get to download these keys.
Note: In a production environment, you should tailor down access to least privilege. This tutorial uses a blanket admin access policy to keep things simple. Be sure to detach this policy when you’re done.
4. Configure a local AWS profile
Now that you have a set of access keys, you can save them inside an AWS profile on your local Mac. Later, you will refer to this profile name in the Serverless configuration file.
Note: It’s a good practice to use AWS profiles so you don’t accidentally deploy infrastructure to the wrong AWS account.
Create a local AWS profile named serverless:
$ aws configure --profile serverless
You will be prompted with a series of questions. Refer to the downloaded CSV file when filling out the Access and Secret Access keys:
AWS Access Key ID [None]: ABCEDFGHIJKLMNOPQRST
AWS Secret Access Key [None]: 1122334455aaBBccDDeeFFggHHiiJJkk//LLmmOO
Default region name [None]: us-east-1
Default output format [None]: json
Test out your AWS profile with this command:
$ aws s3 ls --profile serverless
You should see a list of S3 buckets in your AWS account.
5. Deploy Serverless to AWS
Now that you have a local AWS profile, you can deploy your Serverless app to AWS.
Update serverless.yml with the following:
service: serverless-tutorial  # 1
provider:
  name: aws
  runtime: nodejs4.3
  profile: serverless  # 2
functions:
  hello:
    handler: handler.hello
You are making two changes:
- You rename the service to serverless-tutorial. A service is like a project.
- You specify the local AWS profile you created in the previous section.
Deploy the app to AWS with the following command:
$ sls deploy
You should see the following output:
Serverless: Creating Stack...
Serverless: Checking Stack create progress... .....
Serverless: Stack create finished...
Serverless: Packaging service...
Serverless: Uploading CloudFormation file to S3...
Serverless: Uploading service .zip file to S3 (583 B)...
Serverless: Updating Stack...
Serverless: Checking Stack update progress...
...............
Serverless: Stack update finished...
Service Information
service: serverless-tutorial
stage: dev
region: us-east-1
api keys:
  None
endpoints:
  None
functions:
  serverless-tutorial-dev-hello: arn:aws:lambda:us-east-1:123456789012:function:serverless-tutorial-dev-hello
To make sure that everything is working, invoke your lambda function from the command line:
$ sls invoke -f hello
You should see the following response:
{
  "statusCode": 200,
  "body": "{\"message\":\"Go Serverless v1.0! Your function executed successfully!\",\"input\":{}}"
}
Congratulations! You just deployed your first Serverless app to AWS.
Behind the scenes, Serverless is actually doing a lot of scaffolding. When you deployed the app, you may have noticed the following output:
Uploading CloudFormation file...Uploading service .zip file to S3...
Serverless is using CloudFormation to manage multiple services like Lambda, S3, IAM, and more. Here’s a detailed diagram of how they work together:

- Lambda: Serverless creates a Lambda and deploys your code.
- S3: Your Lambda code is stored in an S3 bucket.
- CloudWatch: Lambda logs events to CloudWatch where you can view errors and console statements.
- IAM role: In order for your Lambda to write events to CloudWatch, Serverless creates an IAM role policy that grants this permission.
- CloudFormation: Everything is created using CloudFormation. This means you can update your configuration, and roll changes back cleanly.
6. Create an HTTP endpoint
Up until this point, you’ve been invoking your Lambda from the command line. In this section, you’re going to use API Gateway to create a client-facing REST API layer.
The Serverless framework makes it easy to add a new endpoint. Just add a few lines to your serverless.yml file:
service: serverless-tutorial
provider:
  name: aws
  runtime: nodejs4.3
  profile: serverless
functions:
  hello:
    handler: handler.hello
    events:  # 1
      - http:  # 2
          method: get  # 3
          path: hello  # 4
This creates a GET HTTP endpoint using the relative path of /hello:
events: Lambda functions can receive events from other services. API Gateway and S3 are common ways to trigger Lambda functions.- http: This indicates that you’re using API Gateway. (The hyphen represents an array item in YAML.)method: You’re using the GET HTTP verb.path: You define a relative path of /hello. This gets appended to an auto-generated URL, which you’ll see later.
Note: Be careful with indentation when working with arrays in YAML.
Deploy your updated configuration to AWS:
$ sls deploy
The output now shows a URL endpoint:
...
endpoints:
GET - https://abcd1234ef.execute-api.us-east-1.amazonaws.com/dev/hello
Paste this URL into a browser, and you should see the following:
{
  "message":"Go Serverless v1.0! Your function executed successfully!",
  "input":{
    "resource":"/hello",
    "path":"/hello",
    "httpMethod":"GET",
    ...
    "body":null,
    "isBase64Encoded":false
  }
}
With API Gateway in front of your Lambda function, your architecture now looks like this:

7. Install the aws-sdk for Node
You can use Lambda as a springboard to access other AWS services. The aws-sdk for Node.js is a popular NPM module that provides JavaScript objects for AWS services like S3.
To get started, type the following command:
$ npm init
When prompted, fill out the following fields. Since this is just a tutorial, just accept the defaults by hitting Enter ten times or so.
name: (serverless-tutorial)
version: (1.0.0)
description:
entry point: (handler.js)
test command:
git repository:
keywords:
author:
license: (ISC)
It should generate a package.json file with the following contents:
{
  "name": "serverless-tutorial",
  "version": "1.0.0",
  "description": "",
  "main": "handler.js",
  "scripts": {
    "test": "echo \"Error: no test specified\" && exit 1"
  },
  "author": "",
  "license": "ISC"
}
The package.json file keeps track of your node modules, dependencies, and versions.
Now enter the following command:
$ npm install aws-sdk --save
This installs the AWS SDK module. The --save flag keeps track of the module and version number in package.json.
Now you can access the AWS SDK from your node application. Update handler.js with the following code:
'use strict';
var AWS = require('aws-sdk');  // <-- this is the only line that changed
module.exports.hello = (event, context, callback) => {
  const response = {
    statusCode: 200,
    body: JSON.stringify({
      message: 'Go Serverless v1.0! Your function executed successfully!',
      input: event,
    }),
  };
  callback(null, response);
};
So far, you’re just getting a handle to the aws-sdk using require.
Deploy the updated code to make sure no issues pop up.
$ sls deploy
8. List a bucket on S3
Now that the AWS SDK is installed, you can start making SDK calls. In this section, you’re going to list objects on S3.
First, you need to create a bucket on S3 that contains a file.
- Within the AWS console, go to S3 and click Create Bucket.
- For the Bucket name, pick something like serverless-tutorial-thorntech-12345. To avoid a name collision, make sure you use a unique bucket name.
- For the Region, select US Standard, or whatever is closest to you.
- Click Create
- Click on the new bucket name
- Under Actions, click Upload.
- Click Add Files to upload a small test file of your choice.

When you upload a file, just use any text file or image. It doesn’t really matter what you use, as long as it’s small.
To list your bucket contents, update handler.js with the following code:
'use strict';
var AWS = require('aws-sdk');
var s3 = new AWS.S3();  // 1
module.exports.hello = (event, context, callback) => {
  var params = {
    Bucket: 'serverless-tutorial-thorntech-12345',  // 2
  };
  s3.listObjectsV2(params, function(err, data) {  // 3
    if (err) {
      console.log(err, err.stack);
    } else {
      const response = {
        statusCode: 200,
        body: JSON.stringify({
          "bucket_list": data // 4
        }),
      };
      callback(null, response);
    }
  });
};
Here’s what’s going on:
AWS.S3():The AWS module has child objects for each AWS service. Here, you get a handle to the one for the S3 service.params: You’re going to use a method that expects an object with a key name ofBucket. Use the name of the bucket you created earlier.s3.listObjectsV2: You pass your object parameter into the listObjectsV2 method. The second parameter is a callback, which gives you access to bucket list data.data: You include the bucket listing in the Lambda response.
Deploy the updated code to AWS.
$ sls deploy
Visit the url, and you should see an Internal Server Error.
{"message": "Internal server error"}
This error message doesn’t really give you much information. To see what’s actually going on, you’ll need to use CloudWatch:
- Go to CloudWatch in the AWS console
- On the left, click on the Logs tab
- Click on the Log Group for /aws/lambda/serverless-tutorial-dev-hello.
- Click on the latest Log Stream.
- Look for any error messages.
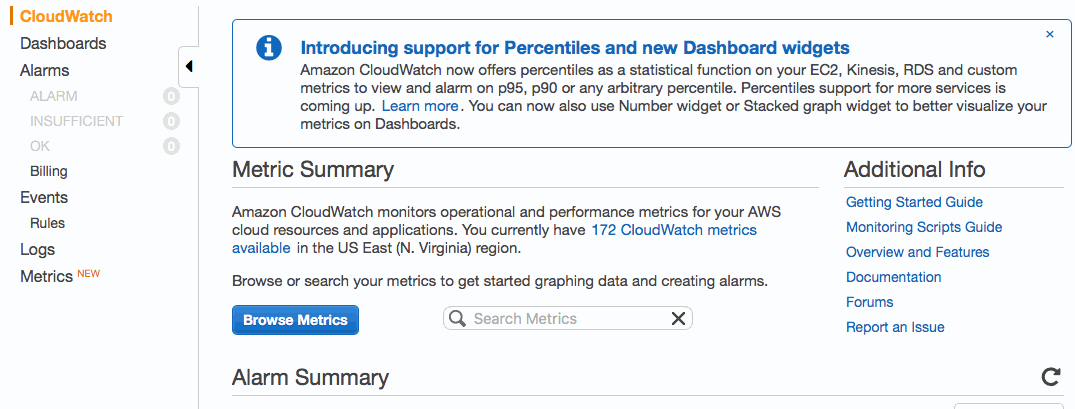
You should see an error message that says Access Denied. The problem is that your Lambda does not have permission to read from your S3 bucket. In the next section, you’ll fix this using IAM.
9. Grant access using IAM
Behind the scenes, Serverless generates an IAM role policy for you. But the only thing you get out of the box is the ability to write logs to CloudWatch. For anything beyond this, you need to explicitly grant access.
Update serverless.yml with the following:
service: serverless-tutorial
provider:
  name: aws
  runtime: nodejs4.3
  profile: serverless
  iamRoleStatements:  # 1
    - Effect: Allow  # 2
      Action: S3:ListBucket  # 3
      Resource: arn:aws:s3:::serverless-tutorial-thorntech-12345  # 4
functions:
  hello:
    handler: handler.hello
    events:
      - http:
          method: get
          path: hello
You grant your Lambda the ability to list the contents of an S3 bucket:
iamRoleStatements: This accepts an array of IAM statements.Effect: You can specify either Allow or Deny.Action: This is a permission that lets you list the contents of a bucket. Refer to the documentation for more available actions.Resource: This is the S3 bucket you are trying to list. Remember to replace the bucket name with the one you created earlier.
IAM policies are in JSON format, and they look something like this. Serverless lets you specify IAM permissions directly within the YAML file, so you don’t have to mess with JSON.
Deploy to AWS again.
$ sls deploy
Visit the url, and this time you should see a list of the bucket contents:
{
  "bucket_list": {
    "Contents": [{
      "Key":"testfile.txt",
      "Size": 12
    }],
    "Name":"serverless-tutorial-thorntech-12345",
  }
}
For my bucket, I have a single file called testfile.txt that is 12 bytes.
Your app infrastructure now looks like this:
Your Lambda is accessing data from an S3 bucket. And using the Serverless configuration file, you grant your Lambda IAM permissions to list bucket contents.
Conclusion
Using the Serverless framework, you created an API in Node.js that lists the contents of an S3 bucket. And you configured multiple AWS services right from the Serverless configuration file:
- Lambda: You specified the runtime and handler.
- API Gateway: You created a GET HTTP endpoint.
- IAM: You granted your Lambda access to S3.
Hopefully this tutorial gives you a running start with the Serverless framework. To learn more, check out the documentation.
Got any tips for using Serverless? Have any suggestions for future tutorial topics? Feel free to add your thoughts to the comments.
Like this post? Please share it using the share buttons to the left. Then join our mailing list below and follow us on Twitter – @thorntech – for future updates.